Destination Actions
Destination Actions are available for all Segment plans.
See the available plans, or contact us.
This document is about a feature which is in beta. This means that the Destination Actions are in active development, and some functionality may change before it becomes generally available
In the simplest form of the core Segment product, Connections, you send data from Segment Sources, and this data is translated by the Segment servers into a format that Destination tools can understand. The Segment servers map data from the different event types to transform it into a format that the destination expects, using a pre-defined set of rules. For most Segment deployments, this works great! However, if you have a complex deployment, or a lot of data coming to your destinations, you might want more control. When you use these standard Destinations, you cannot change these mappings, and it might not always be clear which parts of a Segment event end up in a specific part of the destination format.
Now, Destinations Actions allows you to see exactly how Segment sends event data to a destination, and change the data mapping to suit the needs of your organization. This means you can now explicitly see how Segment data becomes the destination data, without any guesswork or experimentation. Actions destinations are triggered by data coming through your Segment source, just as in a standard Segment destination, but now you can edit the mappings, create more than one mapping to fit different conditions, and describe specific conditions that trigger a mapping.
Each Actions-framework Destination you see in the Segment catalog represents a feature or capability of the destination which can consume data from your Segment source. The Action clearly lists which data from the events it requires, and which data is optional. For example, Amplitude requires that you always send a LogEvent , or Slack always requires a PostMessage. Each Action also includes a default mapping which you can modify.
Destination Actions compatibility
- Destination Actions do not require that you disable or change existing destinations. However, to prevent data duplication in the destination tool, you should make sure you aren’t sending the data through both a standard destination and the Actions destination at the same time.
- You can still use the Event Tester with Destination Actions, and event delivery metrics are still collected and available in the destination information pages.
- If you are using Protocols, Destination Actions actions are applied after schema filters and transformations. If you are using destination filters, Actions are applied after the filters - meaning that they are not applied to data that is filtered out.
- Destination Actions can not yet be accessed or modified using the Segment APIs.
Components of a Destination Action
A Destination Action contains a hierarchy of components, that work together to ensure the right data is sent to the destination.
At the top level, is the Destination itself. It has two children: Global Settings and Subscriptions.
Global Settings are where you include authentication information like API keys, and other connection-related information.
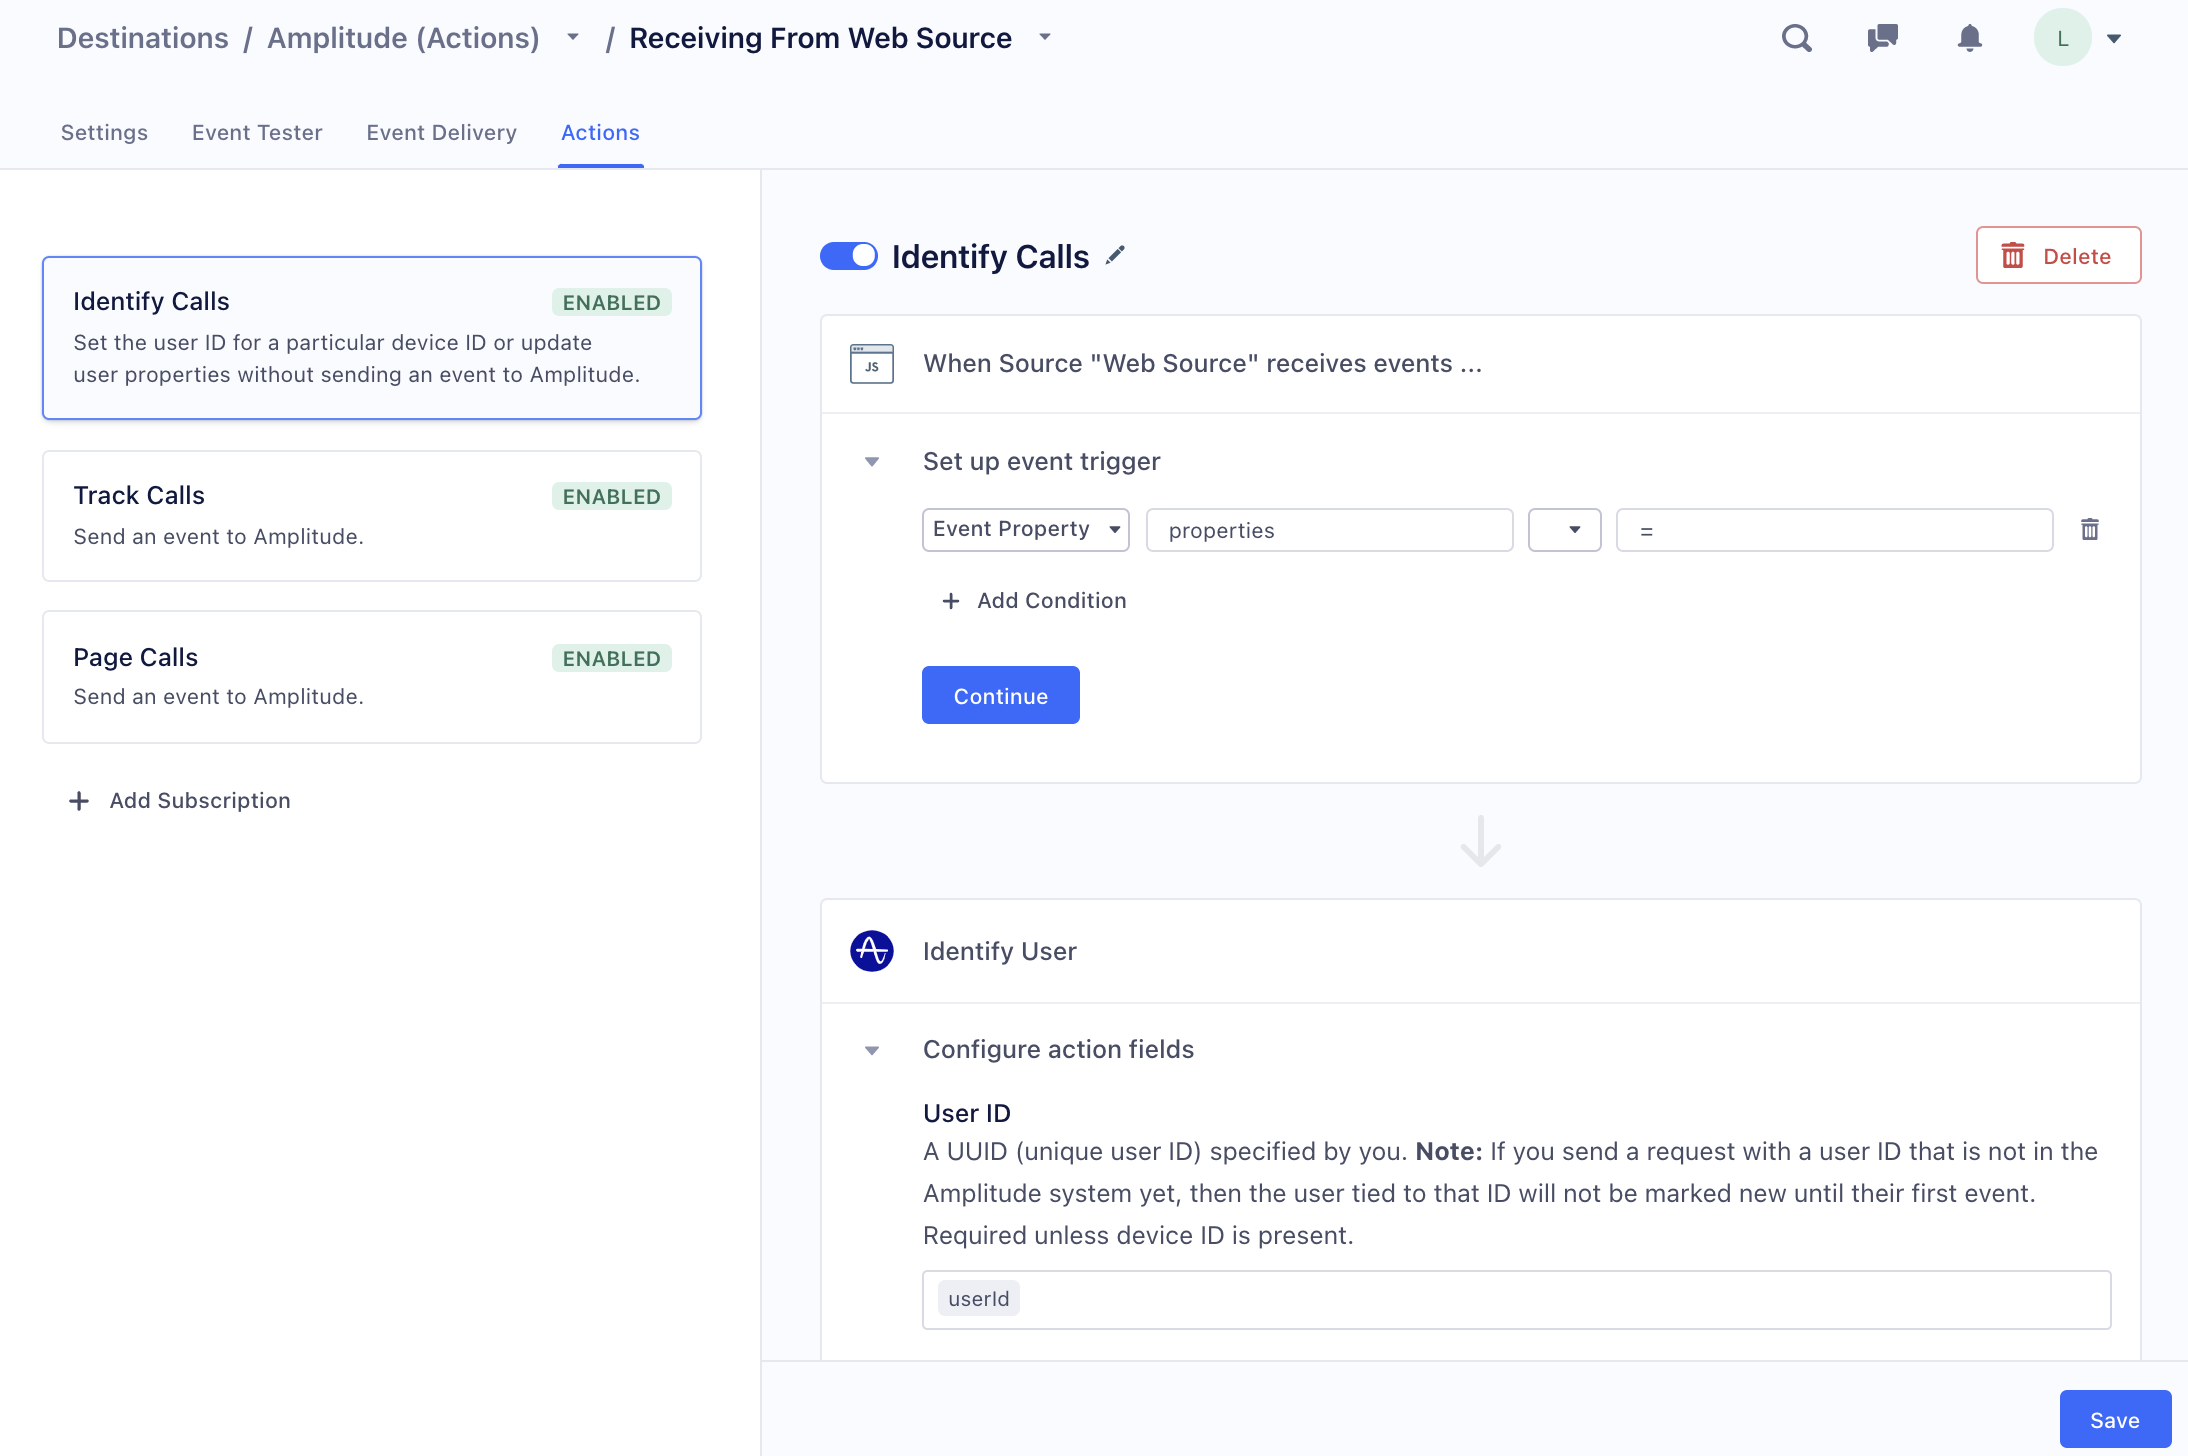
Subscriptions handle the individual calls to the destination. In them, you define what type of call you want to make to the destination, and what triggers that call. Individual Destination Actions come enabled with some predefined subscriptions to handle common events like Screen calls, Identify calls, and Track calls. Subscriptions have two components that make this possible: Triggers and an Action.
Triggers enable you to define when the corresponding Action fires. As part of a Trigger, you can use condition-based filters to narrow the scope of the trigger.
Actions determine the information sent to the destination. In the Configure action section, you map the fields that come from your source, to fields that the destination expects to find. Fields on the destination side depend on the type of action selected
For example, in the Amplitude (Actions) destination, you define your API and Secret keys in the destination’s global settings. Then, the provided Page Calls subscription:
- Triggers the action on all incoming Page events.
- Runs the Log Event action, to map your incoming data to Amplitudes properties.
Set up a destination action
To set up a new Actions-framework destination for the first time:
- Log in to the Workspace where you want to add the new destination, go to the Catalog page, and click the Destinations tab. (You can also get to this screen by clicking Add Destination either from an existing Source, or from your list of existing destinations.)
- Click the Destination Actions category in the left navigation, then click the destination you want to add.
- From the preview screen that appears, click Configure.
- If prompted, select the source you want to connect to the new destination.
- Enter your credentials. This could be an API Key and secret key, or similar information that allows the destination to connect to your account.
- Next, choose how you want to set up the destination, and click Configure Actions. You can choose Quick Setup to use the default mappings, or choose Customized Setup (if available) to create new mappings and conditions from a blank state. You can always edit these mappings later.
- Once you’re satisfied with your mappings, click Create Destination.
Edit a destination action
You can add or remove, disable and re-enable, and rename individual actions from the Actions tab on the destination’s information page in the Segment app. Click an individual action to edit it.
From the edit screen you can change the action’s name, subscription criteria, and mapping, and toggle it on or off. See Customizing mappings for more information.
Disable a destination action
If you find that you need to stop an action from running, but don’t want to delete it completely, you can click the action to select it, then click the toggle next to the action’s name to disable it. This takes effect within minutes, and disables the action until you reenable it.
Delete a destination action
To delete a destination action: click the action to select it, and click Delete (the trash can icon).
This takes effect within minutes, and removes the action completely. Any data that would have gone to the destination is not delivered. Once deleted, the saved action cannot be restored.
Customizing mappings
If you are using the default mappings for a destination action, you do not need to customize the mapping template for the action. However, you can always edit the fields later if you find that the defaults no longer meet your needs.
To create a custom destination action, start from the Actions tab. If necessary, click Add subscription to create a new, blank action.
- In the edit panel, define the conditions under which the action should run.
- Test those conditions to make sure that they correctly match an expected event. This step looks for events that match the criteria in the debugger queue, so you might need to trigger some events with the expected criteria to test your conditions. You can skip the test step if needed, and re-try it at any time.
- Next, set up the data mapping from the Segment format to the destination tool format.
- Test the mapping with data from a sample event. The edit panel shows you the mapping output in the format for the destination tool. You can change your mapping as needed and re-test.
- When you’re satisfied with the mapping, click Save.
The required fields for a destination mapping appear automatically. Click the + sign to see optional fields.
Conditions
The following type filters and operators are available to help you build conditions:
- Event type (
is/is not). This allows you to filter by the event types in the Segment Spec. - Event name (
is,is not,contains,does not contain,starts with,ends with). Use these filters to find events that match a specific name, regardless of the event type. - Event property (
is,is not,less than,less than or equal to,greater than,greater than or equal to,contains,does not contain,starts with,ends with,exists,does not exist). Use these filters to trigger the action only when an event with a specific property occurs. You can specify nested properties using dot notation, for examplecontext.app.name. If the property might appear in more than one format or location, you can use an ANY statement and add conditions for each of those formats. For example, you might filter for bothcontext.device.type = iosas well ascontext.os.name = "iPhone OS"Thedoesnot existoperator matches both anullvalue or a missing property.
You can combine criteria in a single group using ALL or ANY. Use an ANY to “subscribe” to multiple conditions. Use ALL when you need to filter for very specific conditions. You can only create one group condition per destination action. You cannot created nested conditions.
Destination Filters
Destination filters are compatible with Destination Actions. Consider a Destination Filter when:
- You need to remove properties from the data sent to the destination
- You need to filter data from multiple types of call (for example, Track, Page, and Identify calls)
If your use case does not match these criteria, you might benefit from using Subscription-level triggers to match only certain events.
This page was last modified: 09 Jul 2021
Need support?
Questions? Problems? Need more info? Contact us, and we can help!